At first, the idea of starting a website seems simple and easy to implement. CMS solutions like WordPress make it very easy for companies to start a website without a steep learning curve in web development.
As your website grows and you build a global audience, you are faced with a new challenge: enhance user experience.
Creating a large base of regular website visitors takes a lot of effort. Retaining the same audience however takes even more effort.
Delivering a customized experience driven by high performance and deep personalization is the only way to retain website visitors for the long term.
For performance, we have an endless number of solutions. There are many ways you can optimize the speed of your WordPress website.
Also read: How to select the best WordPress web hosting partner for your website?
Personalization is a more serious challenge. It is a word online writers and bloggers often throw around. And yet, there is an imperfect understanding of the true meaning of personalization.
In short, personalization means changing certain aspects of your website based on the preferences of your visitors.
One way of bringing personalization to your website is creating a multisite network.
Multisite: The need to customize experience
What is multisite?
In simple words, multisite enables you to build and manage a network of websites from the same platform.
You must have seen how major platforms like Amazon and Netflix update their recommendations based on the country their users are in.
Generally, preferences overlap amongst people in the same country. American users for instance are more likely to be interested in English content, product currency in USD, and so on.
These preferences would naturally change when you switch to another country.
Thus, it makes sense to create a different website for every country. It is the fastest way you can achieve personalization and consequently enhance user experience.
Multisite essentially enables you to achieve this goal. You can create a network of websites for different countries and offer a localized experience for each.
How to build a multisite on WordPress?
Now that we understand the importance of multisite, it is time to use WordPress to build a network of websites.
We have divided the process into four main parts. You will have to complete multiple steps for every part to build a multisite network.
Part one: Enabling multisite feature for your WordPress website
The first step is enabling multisite for your WordPress website. You don’t need to pay any special fee to enable WordPress multisite.
It is however wise to first check with your hosting provider about multisite capabilities. You must select a web host that makes it simple to set up a WordPress multisite.
After consulting your web host about multisite, it is time to enable it on your WordPress website. The following steps explain the process in great detail:
- Get access to your website resources with a FTP client or your cPanel file manager.
- Open the wp-config. php file. You will find a number of lines of code here.
- Look for this line in the code: /* That’s all, stop editing! Happy blogging. */
- Place the following code before this line: define( ‘WP_ALLOW_MULTISITE’, true );
- Upload the config file back to your website.
The multisite feature is now enabled on your WordPress website. It is now time to set up a multisite network on your website.
Part two: Install multisite on your WordPress website
Once the multisite feature is enabled, you can select the specs of the network you are trying to build.
First, you should deactivate all the WordPress plugins on your website. This is only a temporary step.
Next, you will have to set up your multisite network. Follow the steps laid out below:
- Go to Tools in your WordPress menu and select Network setup
- Then, you will have to choose between structuring your network on either subdomains or subdirectories.
- In case you choose subdomains, you can create a wildcard subdomain.
- This will basically ensure all the subdomains you create in the future will point to your website.
- To create a wildcard subdomain, visit your cPanel dashboard.
- Select Subdomains. You will find it in the domains section.
- Enter * in the subdomain field.
- Enter your main website URL in the domain field.
- Select Create. You will see a message saying that a subdomain has been created.
- You don’t need to make any special changes in case you choose subdirectories to structure your multisite.
- Enter a title for your network and the email ID of the admin.
- Click Install when you are done.
WordPress will provide you two snippets of code – one for the wp-config.php file and the other for the .htaccess file.
Part three: Edit your wp-config and .htaccess files
Next, it is time to make final edits to your website files. Keep the code snippets you got from WordPress in hand while you proceed with the following steps:
- Open a FTP client or your cPanel file manager.
- Open to wp-config.php file.
- Look for the line: /* That’s all, stop editing! Happy blogging. */
- Add the code snippet meant for the wp-config.php file here.
- Next, open the .htaccess file.
- Replace the existing WordPress rules with the code snippet you received for the .htaccess file.
Once you make these changes, login to your WordPress website again. In the last step, you can finally start building your network of websites.
Part four: Add websites and manage your multisite network
After logging back in, you will see a new My Sites button in the top menu.
Navigate to Network Admin -> Dashboard. You will find yourself on your multisite network dashboard.
You can manage your entire network from this dashboard. In the following sections, we will discuss a few things you can do on this dashboard.
Adding a new website to the network
One of the first things you should do is add a website to your network.
- Simply select My Sites in the top menu.
- Navigate to Sites under Network admin.
- You will be redirected to the Sites page. You can view all the active websites in your multisite network.
- Select Add New. You will have to enter the site address, title, language, and admin email here.
- If the email you enter is nowhere in the database, a new user will be created. An email will be sent to the new user on the same ID. The new email will contain the username and password.
To register new users, you will first have to enable registrations. Visit Network Settings under Settings. You can configure Registration Settings here with options to allow new users to create their own sites, invite their own users, and more.
Managing plugins and themes
Site admins managing the new websites in your network won’t have the ability to install new themes and plugins.
However, you can provide access to all your plugins and installed themes to every website in the network.
Simply visit Plugins or Themes on your multisite dashboard and select Network Activate for any given plugin or theme.
Every website in your network can activate or deactivate a theme or plugin. However, they cannot add anything new to their website.
You can additionally set up default content for new websites added to your network with New Site Setting under Network Settings.
You can add placeholder content for the first post and page of the new website. Additionally, you can update the welcome email sent to the user when a new website is created.
Building a single mobile app for your multisite network
Enabling WordPress multisite enables you to offer personalized app experiences for users in different countries.
However, the rising tide of app usage shows that depending on websites to deliver traffic and engagement is not viable.
Starting a mobile app is thus the only way out. With AppMySite, you can now make your own app for your vast multisite network.
AppMySite recently released the Multisite support add-on. Using this add-on, you can create a single mobile app for your entire network of websites with a few simple clicks.
The process of creating a mobile app for WordPress multisite is explained below:
- Create a unique app for every website in your network with the AppMySite free app builder. You should create these apps with the same AppMySite account.
- Purchase the Multisite support add-on. You can find the new addon under the App Add-ons section. Get on a paid plan to purchase this add-on.
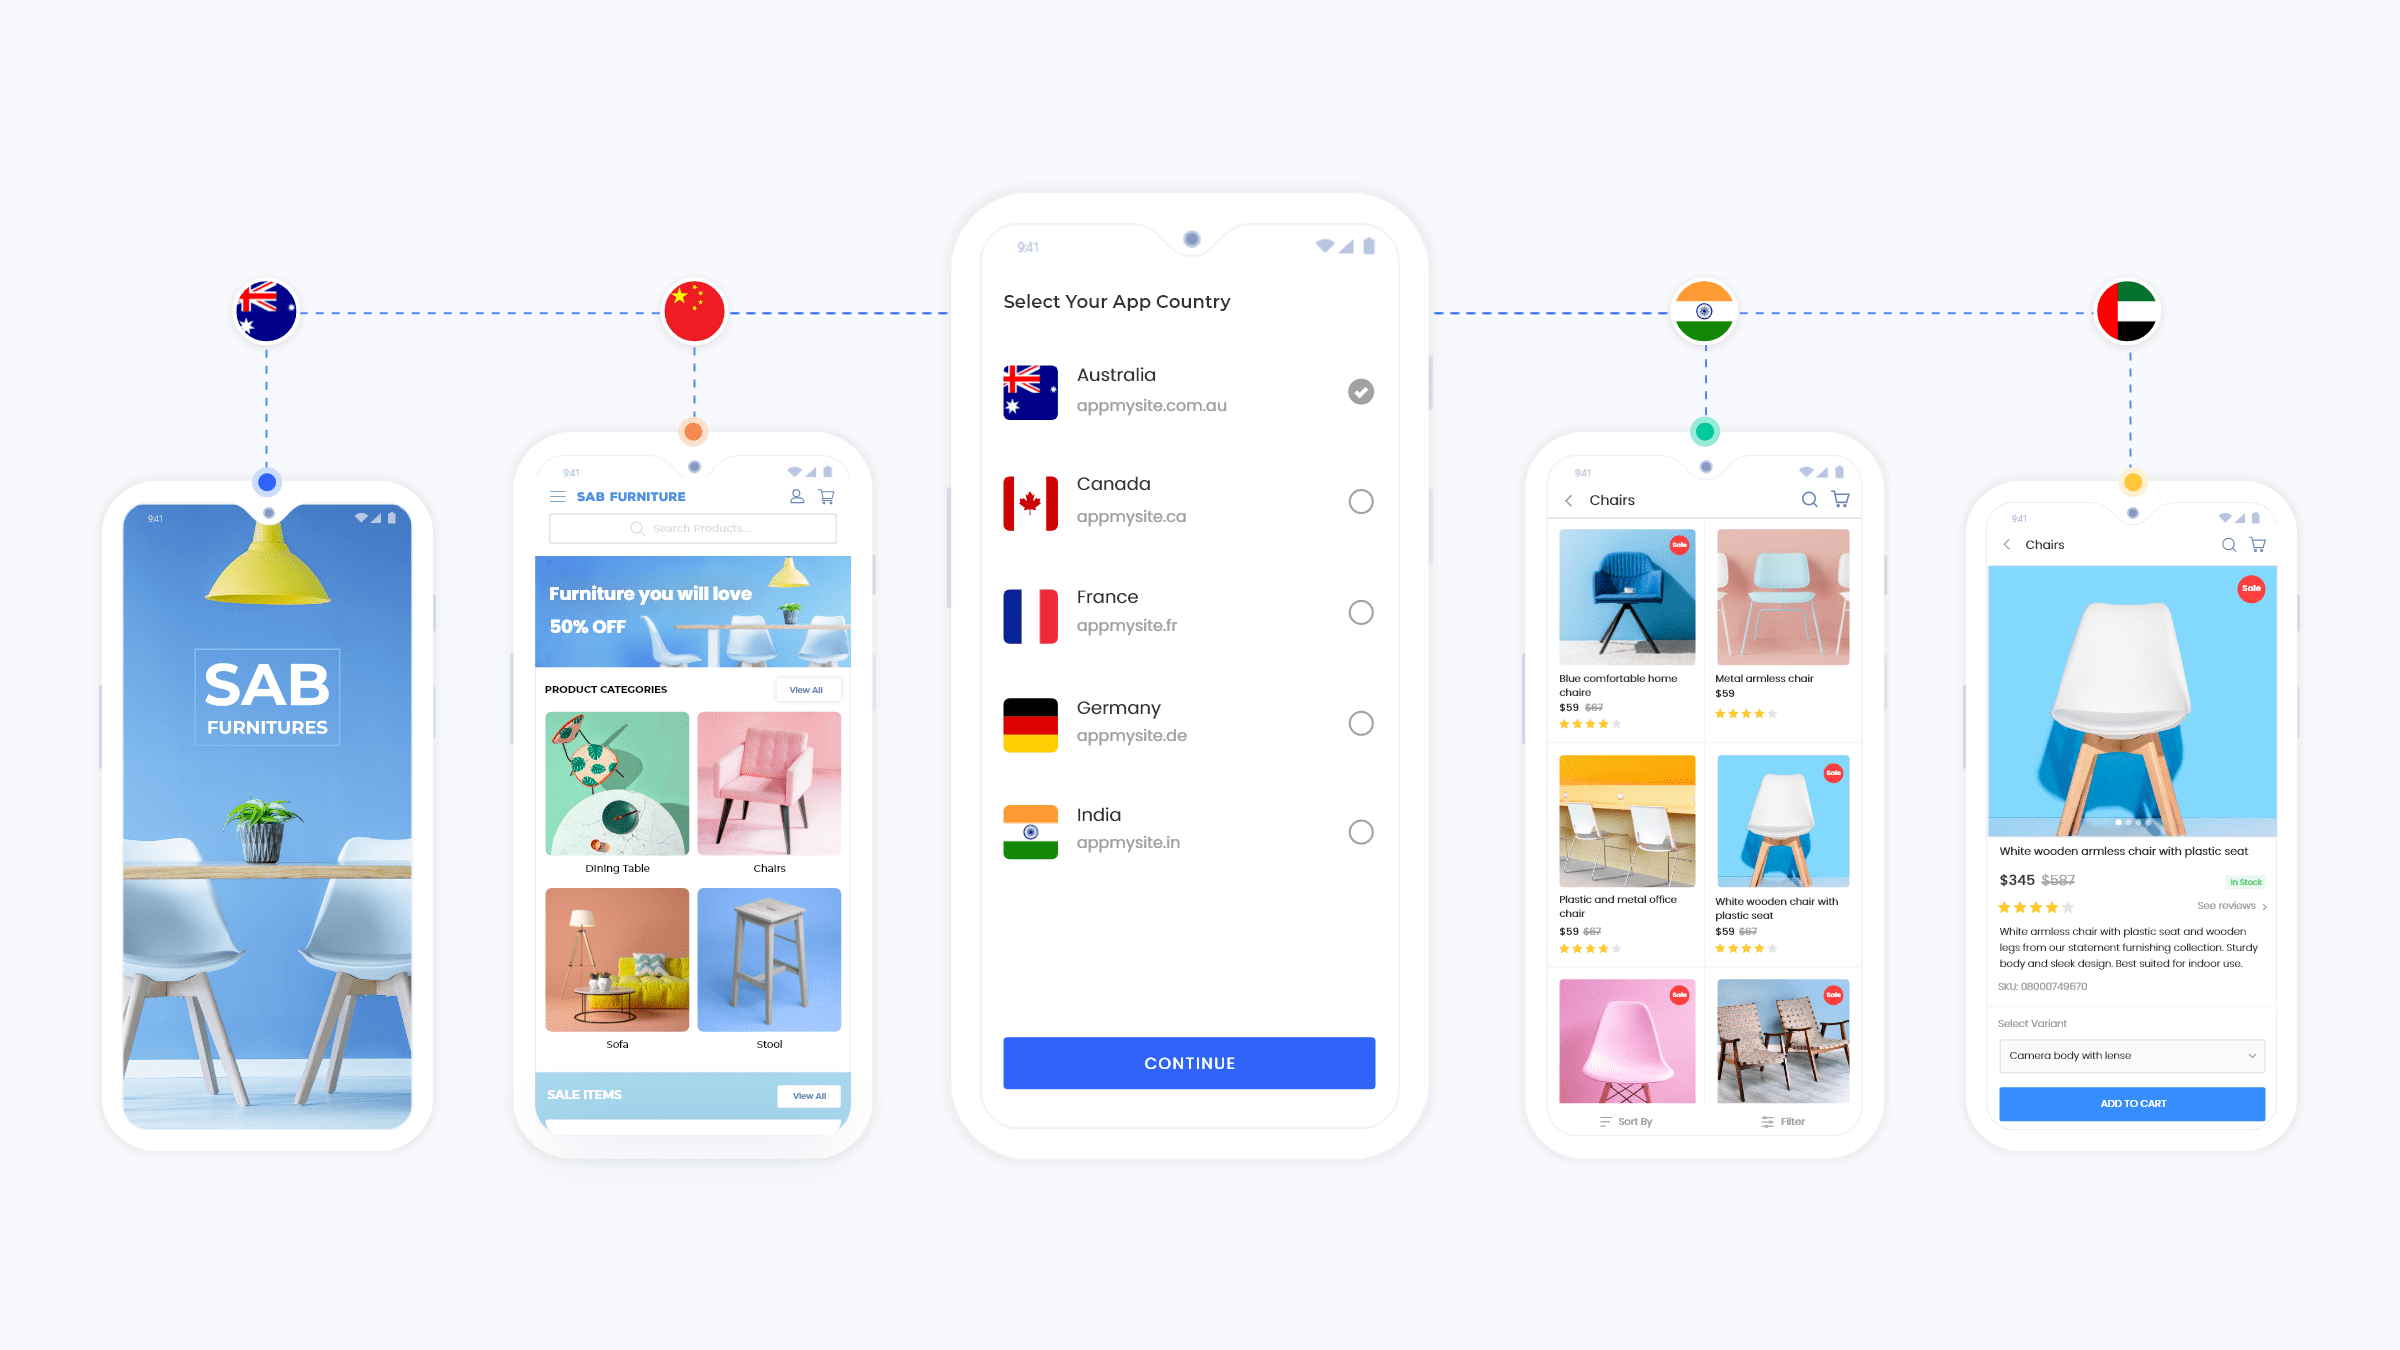
- In the Multisite section, select Add app and start selecting the apps you have built for each website in your network.
- Assign a country to every app you add.
- Generate builds using the same app you purchased the Multisite add-on with.
You can make changes to your multisite app as the owner of the app. None of the users you invite can make any changes in the Multisite section.
The add-on will be available for all apps with code version 1.6.0 and above.
In conclusion
User experience optimization is a common goal for both apps and websites.
This piece provides a complete guide on starting a multisite network for your WordPress website.
With AppMySite in the picture, you can now create a WordPress app for every country you wish to target and connect them together to build a single multisite app.
Thus, it is a no brainer to engage your audience by taking the multisite route.
