With over 455,000,000 websites running on its platform, WordPress certainly needs no introduction. It has been estimated that WordPress powers over 35% of the internet.
WordPress certainly is the leading platform for building a thriving business online, especially a successful blogging website.
Building an online blog may seem to be a daunting task, especially if you are not that geeky but you need not worry. If you are wondering how to set up a blog, then you’ve reached the right place.
Here is the most comprehensive guide on starting an online blog with WordPress. It’ll give you a step by step and easy to follow walkthrough of the complete process.
Building a fully functional blog website with WordPress is much easier than you think. And we’ll help you achieve it with this article.
You’ll need a few things to get started
- A domain name
- Web hosting account
And that’s it, these are the only two things required to start building your WordPress blog. Let us discuss how. Do not worry if you do not have either, we will guide you through with the above prerequisites as well.
Roadmap – How to build a blog with WordPress
Stay tuned and discover the step by step process to build a blog with WordPress:
Step 1 – Selecting a niche for your blog
A niche is a specific topic or industry which you will write about on your blog. The more you will write about this niche, the more authority your domain will gain in the specific niche or industry.
When picking a niche, you must focus on what you’d like to discuss, or what your field of expertise is.
There is a cache though, there are some niches that are so difficult to rank in that it’ll take you ages to become successful in it.
And on the other hand, some niches are not difficult at all, but they are not easily monetizable or profitable.
Therefore, the best way forward is to take a middle path. And there are some ground rules to pick that niche. They are discussed briefly below.
1. Select what you enjoy discussing
Select a niche of either of your expertise or what you enjoy talking about. This way you can ensure that you never run out of ideas to write about.
2. Do market research
Ensure that there is already a market for your niche and that it is profitable. You can use Google Trends to your advantage.
3. Do not pick a huge niche
It is much easier to gain authority in a smaller niche than a broader umbrella market. For instance, the niche for skating would be much easier than sports.
Step 2 – Registering a domain name for your blog
There is a pretty high chance that you already have a name for your blog in your mind. But have you looked for a domain for the same name?
There is an even higher chance that your preferred domain name could be already taken up by someone else. This especially happens when you pick a very common name or a name that is easily thinkable.
In either case, select a unique name for your blog and a matching domain name.
A domain is like your website’s permanent address. Just like www.appmysite.com is the address of our website.
There are several domain providers online where you can purchase your domain name. Domain.com, Bluehost & GoDaddy are some of the many such domain registrars.
There are also multiple domain extensions available for you. While you can select any extension for your domain, the most standard selection is a “.com” extension.
You can also select a domain extension based on your geography. This is especially helpful if your target audience is specific to one geographic demography.
Go ahead and purchase your preferred domain. We recommend getting the license for at least a year.
PRO TIP: Pick a domain that is short to remember and represents your niche the best. This greatly helps with the branding and marketing of your blog.
Step 3 – Registering for a website hosting account
Every website on the internet runs on a host. A host is an engine that powers your website. It stores all of the shared files and folders of your blog and delivers on-demand.
Just like the domain, a host is also a necessary prerequisite for setting up your blog.
There are many hosting providers that can offer you hosting services. Some of them are Bluehost, Hostgator, SiteGround and more.
WP Engine stands tall amongst the web hosts mentioned earlier. It is designed to provide fast and reliable WordPress experiences that match every performance standard. Serving over 90K clients across 140 countries, WP Engine is the best hosting partner you can start your new WordPress blog with.
Want to get started with WP Engine? Click here and get a hosting plan for your own website.
PRO TIP: There are many hosting providers that also offer domain and a WordPress installer for setting up WordPress blogs. Building a WordPress website will become a breeze then.
Step 4 – Installing and setting up WordPress
WordPress is a free CMS platform and you’ll need to install it on your website if you want to create your WordPress blog.
Many hosting providers come with a WordPress bundle attached. We recommend you get that with your domain and hosting account. This will automatically install WordPress on your website.
Starting a WordPress blog may sound a little intimidating, however, you’ll be surprised to know how easy it is this way.
WordPress is free to install and set up. Once WordPress is installed and set up, you are ready to customize and design your WordPress blog.
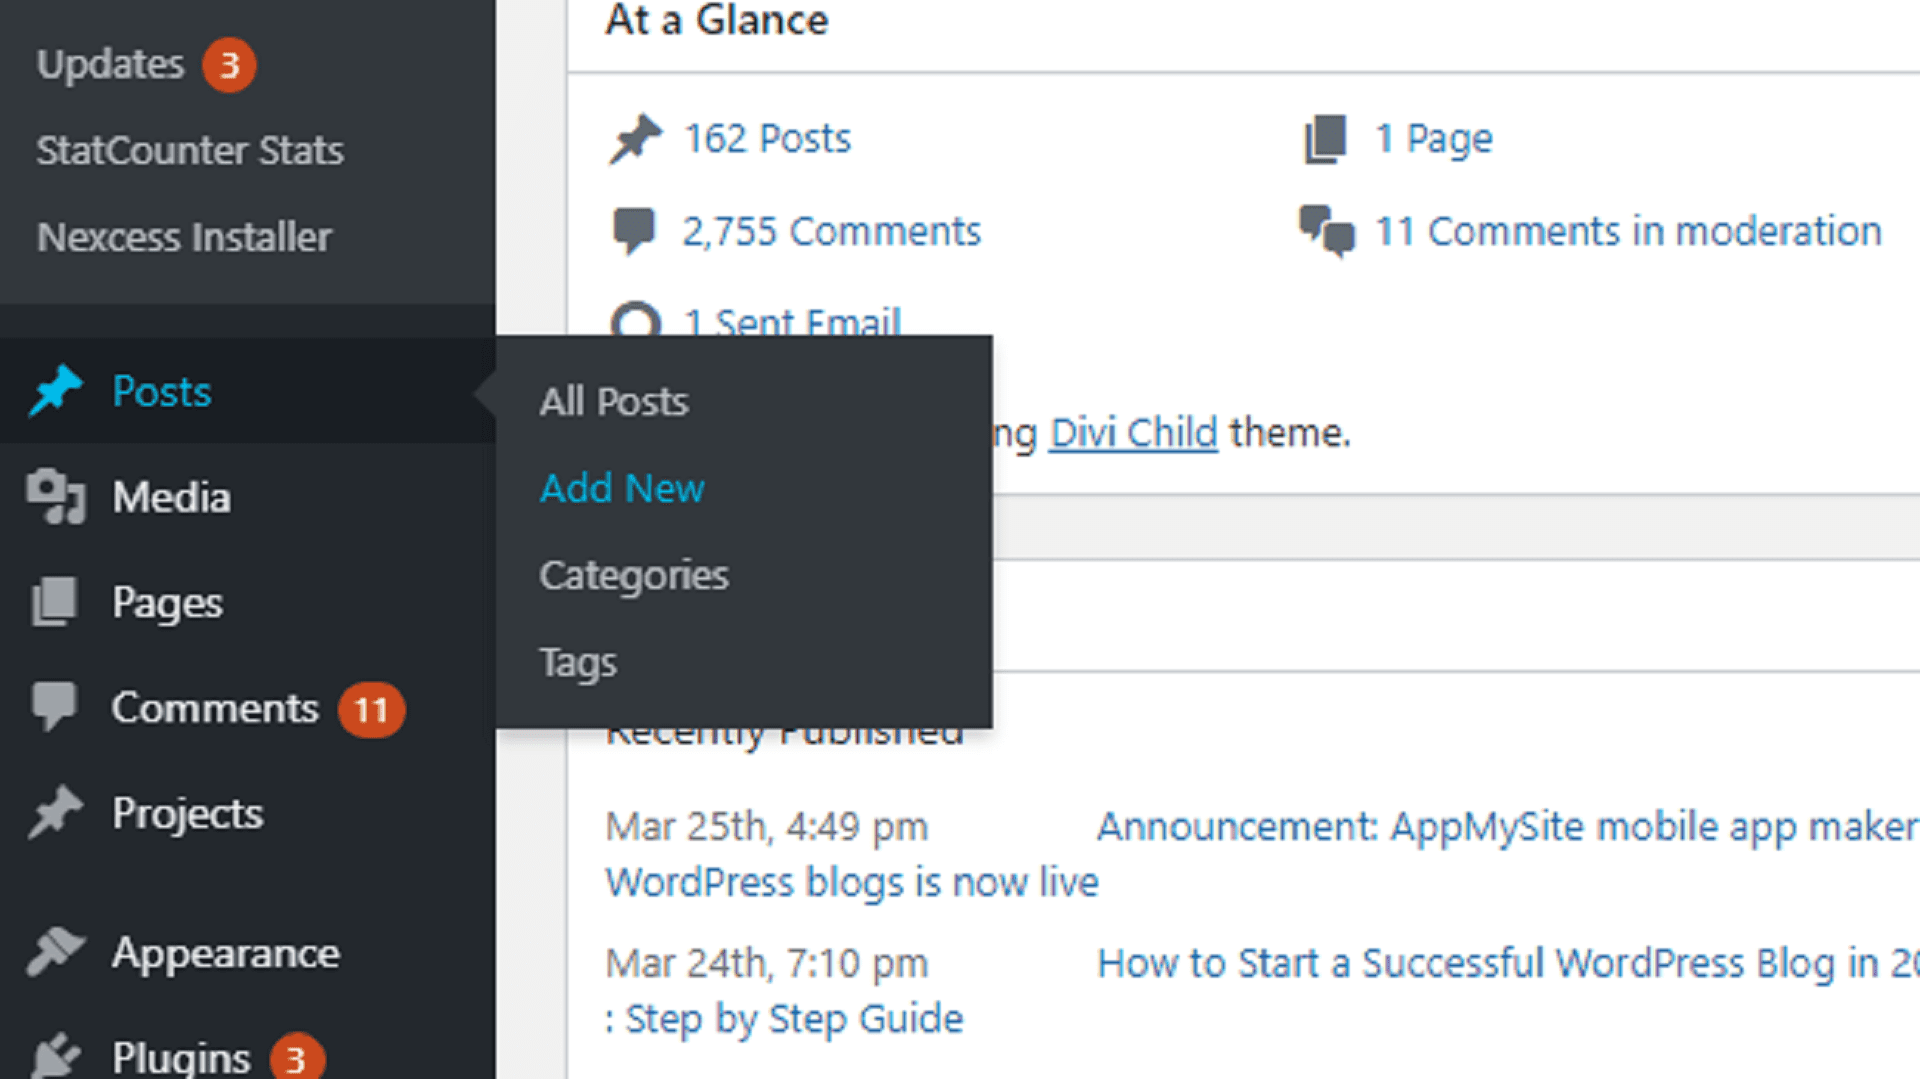
Step 5 – Write your first blog post
Now that your website is up and running, it’s time to add your first blog. This blog will also serve as a sample when you will design and customize your WordPress website in the coming sections.
Firstly, go to the dashboard of your website and navigate to Posts >> Add New.
This will open up the WordPress editor. Add the contents of your article including the title, blog post and a few relevant images.
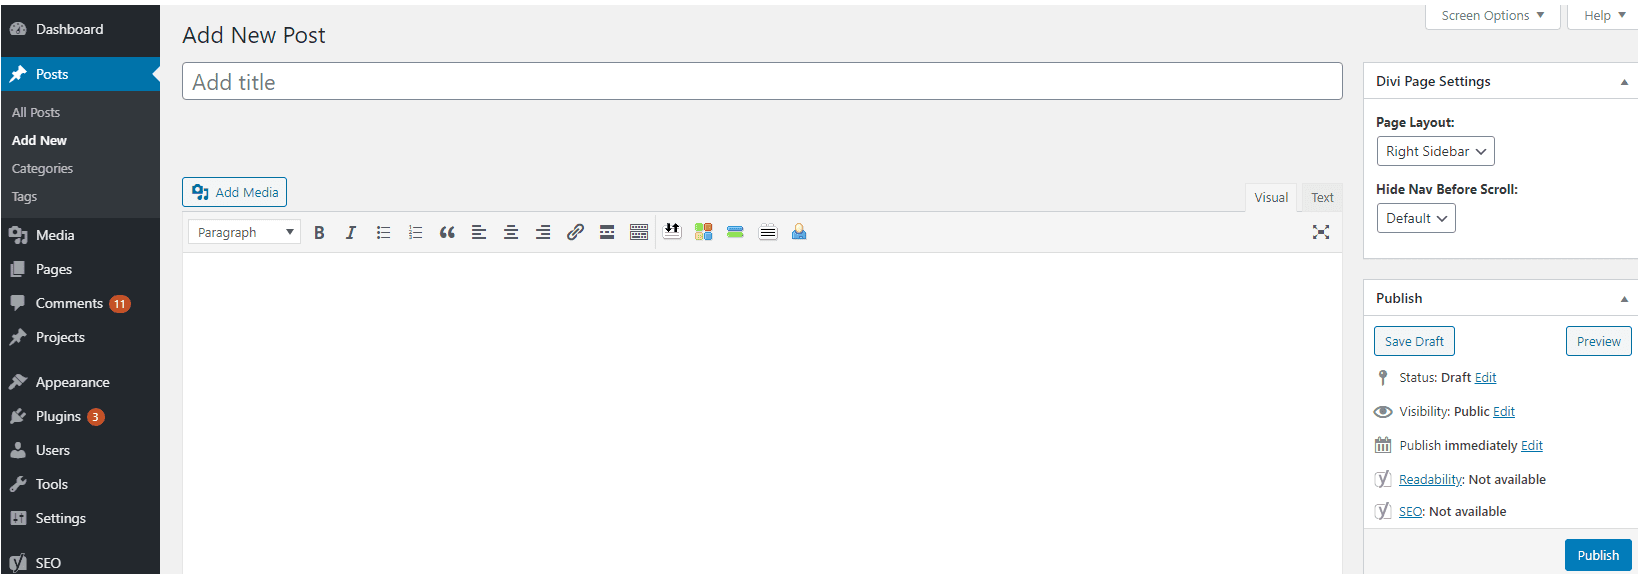
Enter the URL of your blog page, and click on the Publish button and your blog will go live.
Step 6 – Designing & customizing your WordPress Blog
The most exciting part of making a blog is designing it and customizing it. Having a visually impacting blog is as important as having great content for your audience.
A great WordPress design does not only include great colors and fonts but also good user interface. Your user’s experience should be a top priority.
The visual appearance of your blog depends on the theme that you select. And there are hundreds and thousands of pre-made themes available for you.
There are both free WordPress blog themes and premium themes available for you that you can take advantage of.
Navigate to Appearance >> Themes and click on the Add New button.
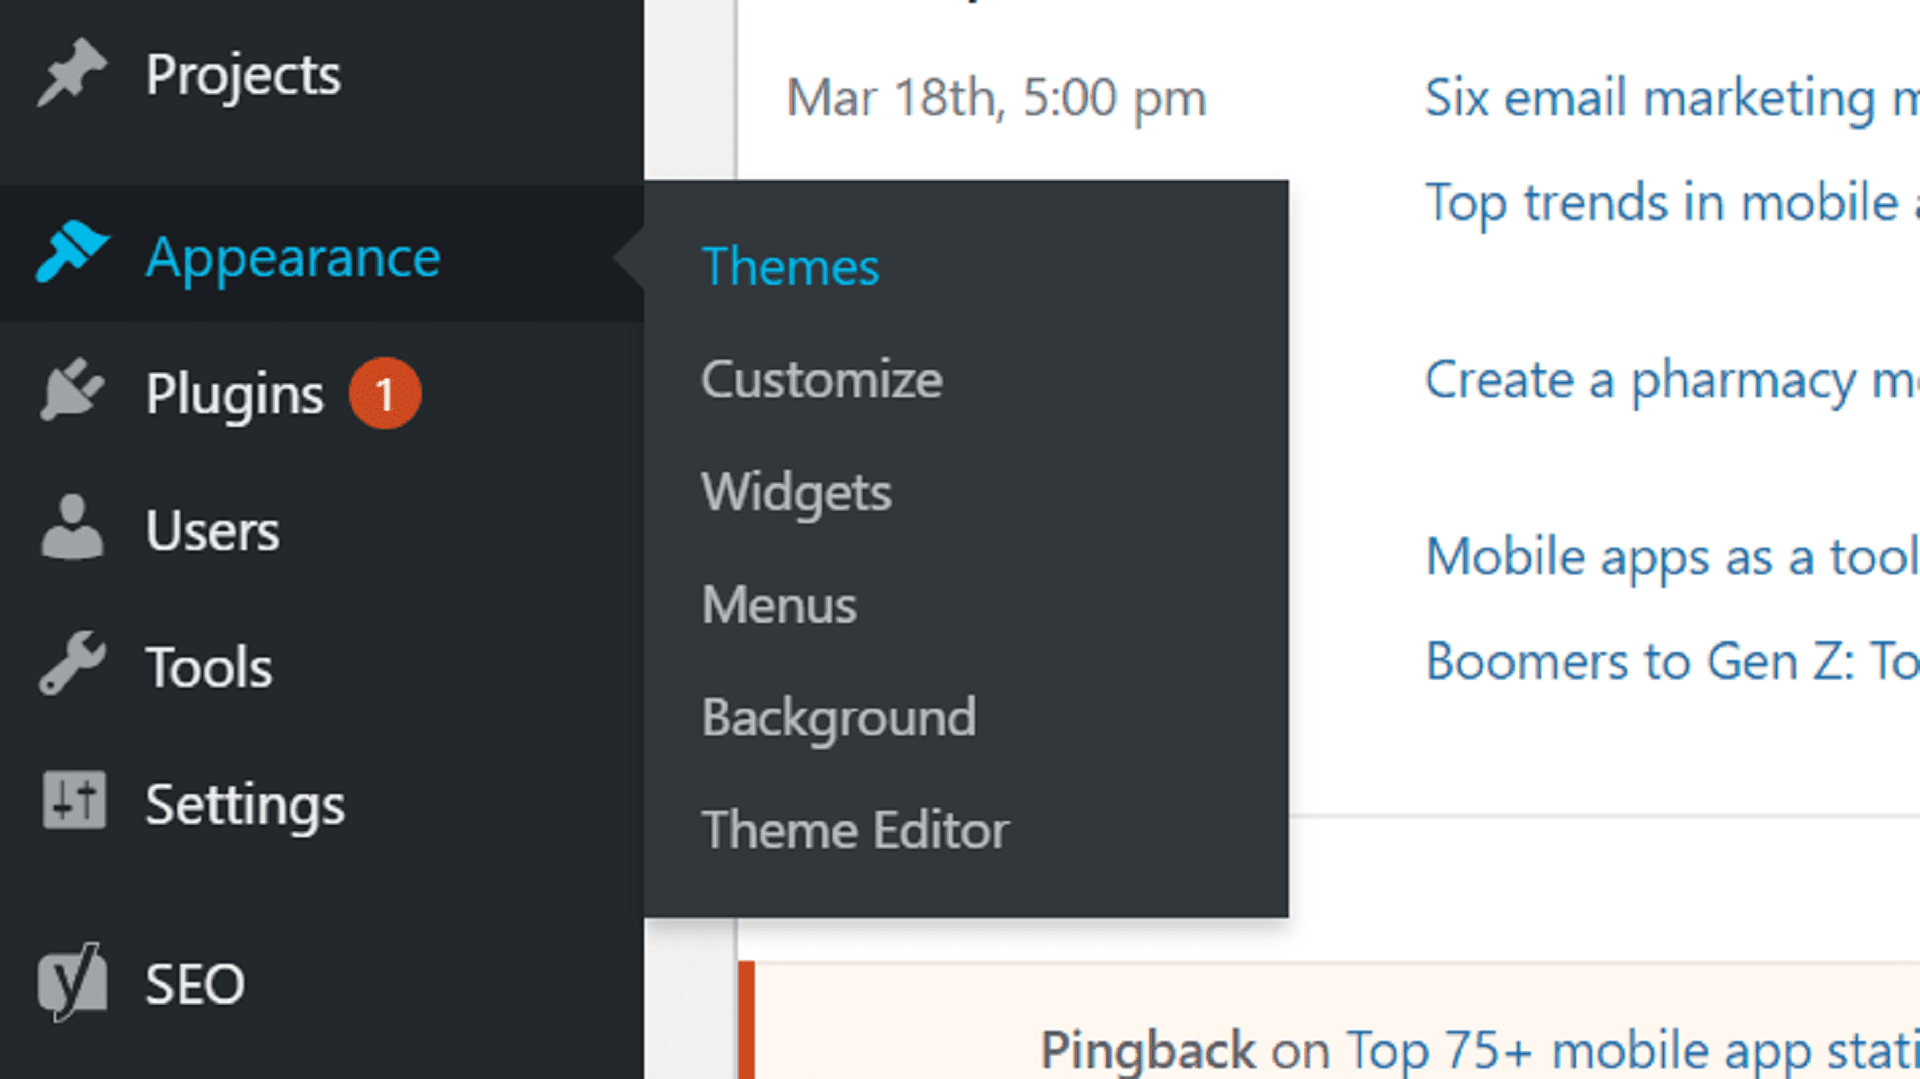
On the next screen, you’ll be able to select from over 7000 free themes. You can also preview each theme before selecting one for your website.
PRO TIP: With so many themes to select from, it is natural to get confused, especially for a beginner. We recommend that you choose a simple yet pleasing theme. It helps you keep things clean and easy to comprehend.
Finally, when you have selected the theme of your choice, click on the Install button. Once installed, click on the Activate button to activate the theme on your website.
To customize your theme to your requirements, navigate to Appearance >> Customize.
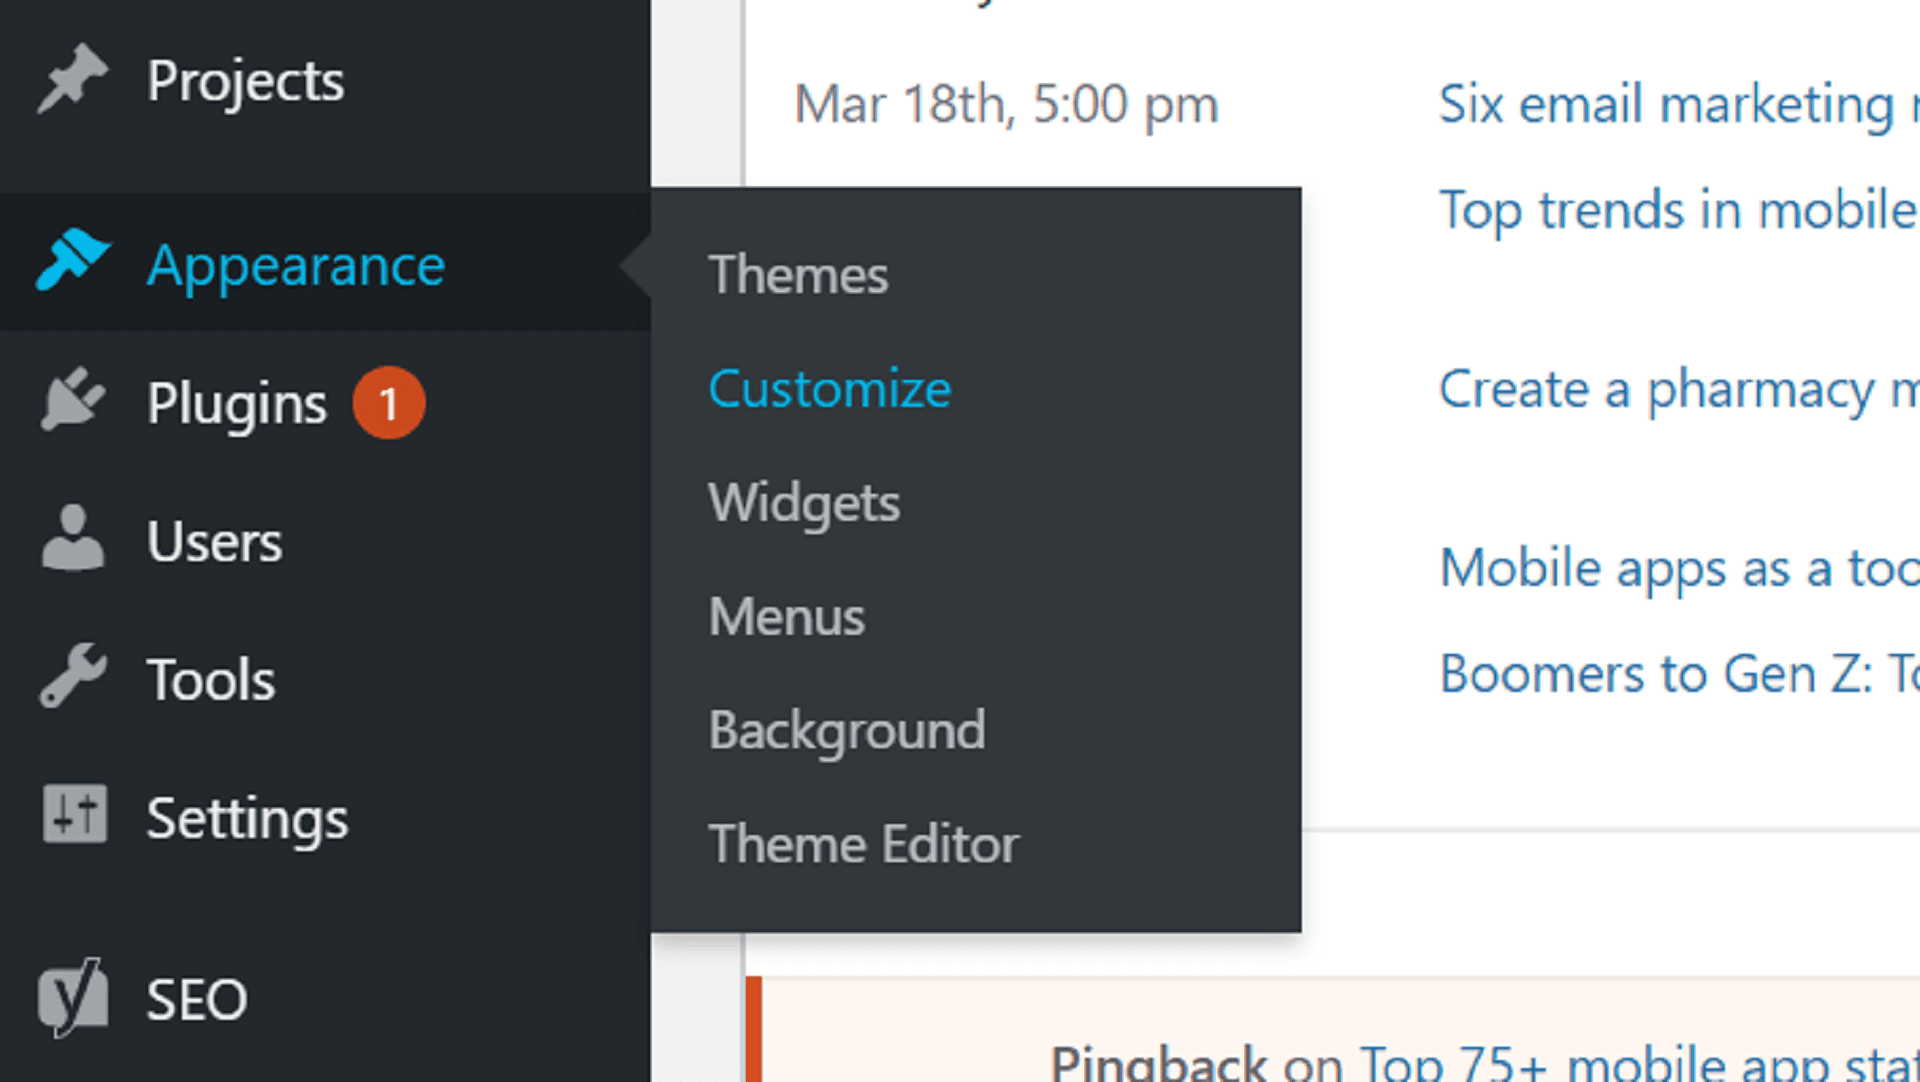
Depending on your selected theme, you’ll get different options to customize your theme design. Along with that, you get a preview of your blog to finalize on your specifications.
Step 7 – Adding custom functionalities with Plugins
A WordPress website can be more than just a container for all your articles. You can add multiple new features and functionalities to your website to enhance it.
This is done by plugins. A plugin in its most basic form is a piece of software that when added to your website, adds one or more functionalities. They help extend your website’s offering.
There are over 50,000 plugins available on WordPress, in both free and paid versions. This means that you have a WordPress plugin to resolve any requirement for your website.
You find all the plugins on the official WordPress website – https://wordpress.org/plugins/.
Let us now see how to install plugins for your WordPress blog website.
How to install WordPress plugins?
Navigate to Plugins >> Add Plugins. Here you’ll see many popular plugins already populated for you.
You can either select from these plugins or search for a specific one from the search bar available. Once you’ve shortlisted a plugin, simply click on the Download button and then Activate it to install the plugin on your website.
PRO TIP: Given the massive number of plugins available on WordPress, selecting plugins for your website must seem like a daunting task, especially for a beginner. Therefore, to ease this process, we have curated a list of the top 12 plugins that you must download on your website.
Step 8 – Setting up Google Analytics for tracking website traffic
This one setup is so underrated yet important that it will help you forever in your blogging journey. Google Analytics helps you track the traffic on your website and offers amazing insight into your audience.
This data will help you analyze and understand your audience demographics, behaviour, and preferences.
Basically it will answer some fundamental questions for you like who is visiting your website, who they are, where are they coming from and where are they going, what they like and what they do not.
It will not only help you analyze your progress but will also help you take informed decisions to grow your brand.
Let us see how you can set it up.
Visit the Google Analytics website and sign in to your Google account. You can create a new account if you don’t already have one.
Once you are logged in, go ahead and sign up for a free Google Analytics account for your blog.
It will ask you for critical information such as your website URL. Once you’ve submitted this information, you’ll be given a tracking code.
Now you just need to add this code to your website. You can either simply add this code to your website’s source code. Or download tracking plugins to ease your task.
For this, download the Google Analytics plugin and install it on your WordPress blog website’s backend.
You’ll now see a Google Analytics option on your backend dashboard. Navigate to Google Analytics >> General Settings. Click on Authorize Plugin and enter the enter the tracking code.
Now click on Get Access Code. You’ll be redirected to the Google Analytics page, click on Allow. Now you’ll get an access code. Go back to the website’s backend and paste this code here. Finally, click on Save Access Code.
You should now see the traffic on your Google Analytics dashboard.
PRO TIP: Another amazing plugin for tracking insights is Monster Insights.
Step 9 – Optimizing your website for SEO
Many times first time bloggers make the mistake of not optimizing their websites for search engines. What ends up happening is that the website then never ranks for any keywords on search engines like Google.
Therefore, it is highly important that your website is optimized for search engines. And one plugin that helps you solve all your SEO problems is Yoast SEO.
Simply download this plugin to your WordPress blog website’s backend and activate it and optimize your blog by following its tutorial wizard.
Step 10 – Monetizing your blog
Voila! So, your website is now up and running. You are now ready to monetize this asset of yours.
You’ll come across many “get rich quick online” schemes in reality, however, they are just schemes that do not generally work.
What we want to emphasize on is that with consistent effort and quality work, you can certainly make it a profitable business.
Here are our top tips to monetize your blog.
1. Affiliate Marketing
Affiliate marketing is a branch of marketing where you earn by promoting products or services of other brands.
Affiliate marketing is the process of earning a commission by promoting other people’s (or company’s) products. You find a product you like, promote it to others and earn a piece of the profit for each sale that you make.
2. Online Store
If you have products to sell, then you can very easily create an online store on your website with WooCommerce.
Promote your products in your articles and give direct links to your products to facilitate sales. You can also sell other brands’ products if you are an affiliate.
Suggested read: A complete guide on setting up an online store with WooCommerce.
3. Marketing your services
Just like selling products, you can always market any service that your expertise in via your articles. Promote your services and get leads for new clients.
4. Google AdSense
You can also make money by displaying ads from Google on your blogs. This is possible by Google AdSense.
Google AdSense is the biggest platform for bloggers and publishers to earn from display ads.
Step 11 – Building a WordPress mobile app
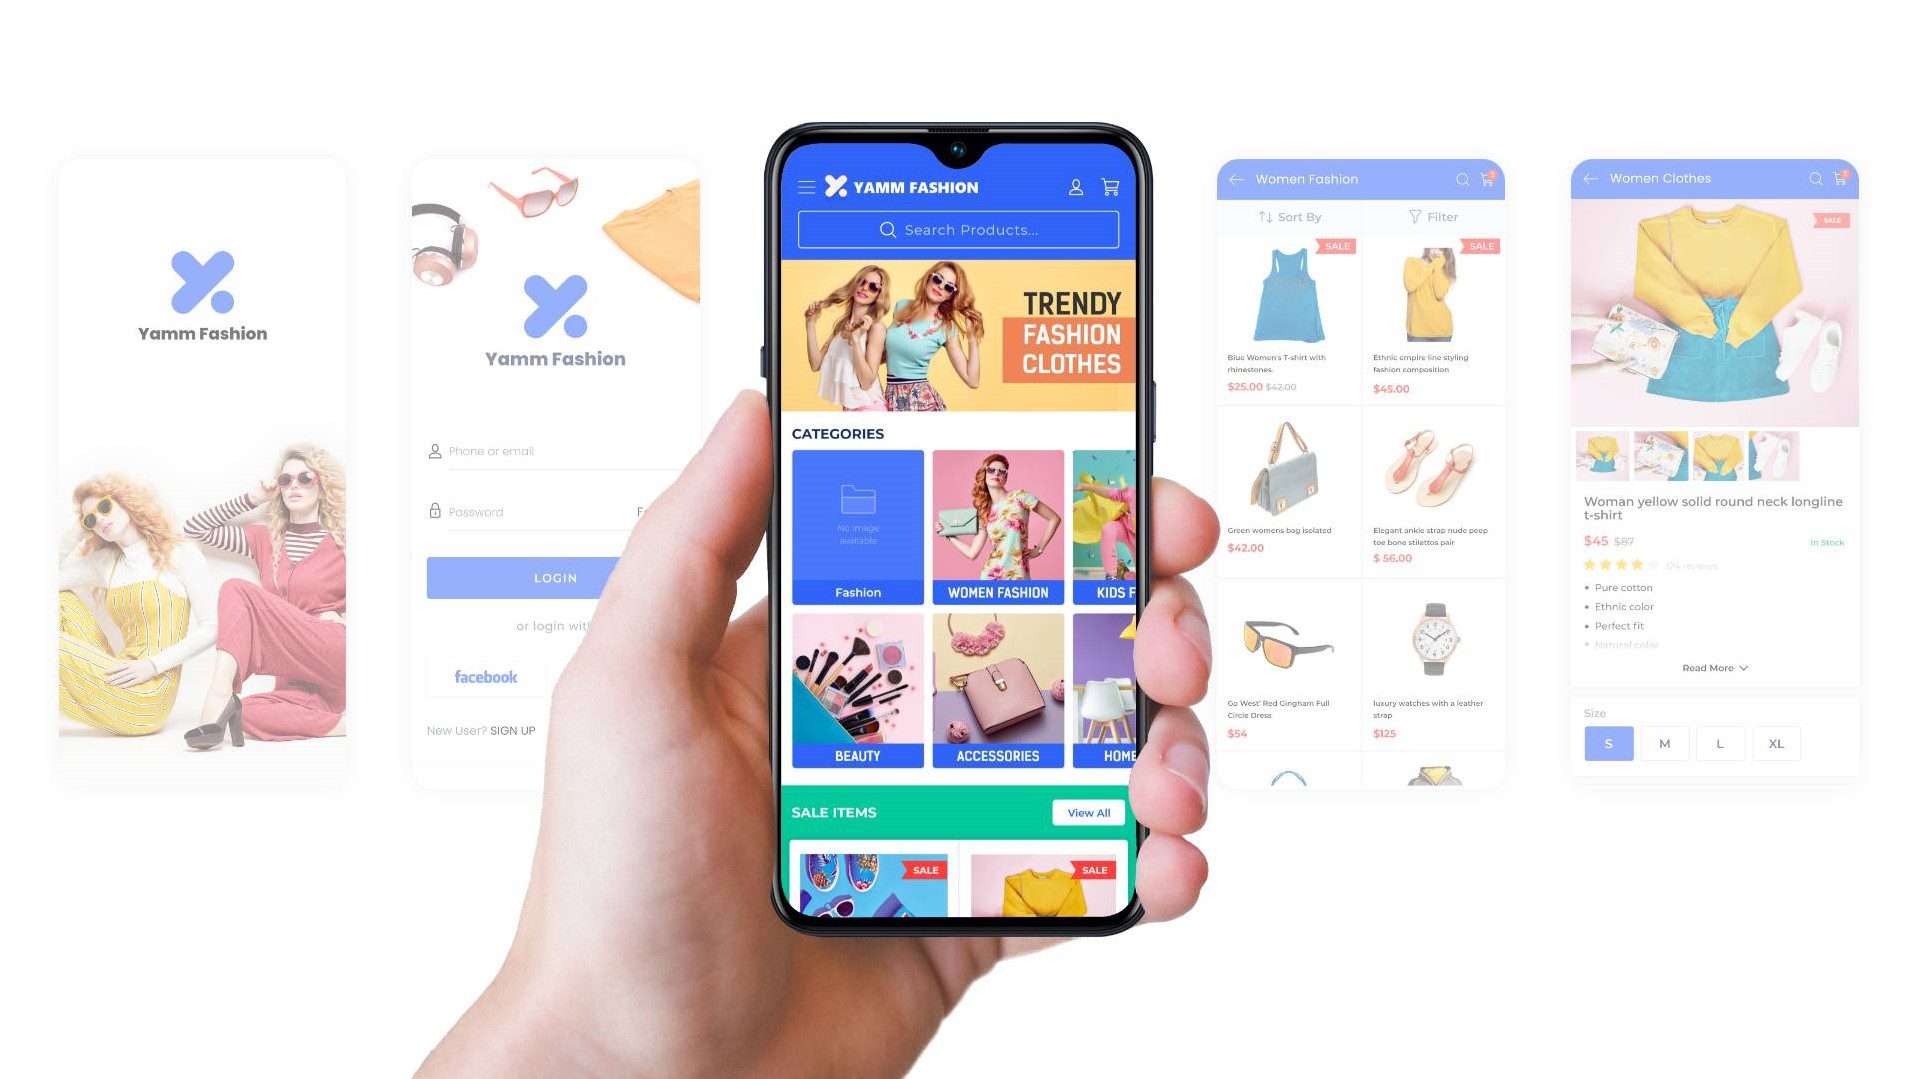
Building a mobile app for your WordPress blog is the final step towards having a successful blogging brand.
Studies have shown that more than 455 million active websites are running on WordPress. And a premium mobile app helps you easily stand out from the rest.
It has been reported that more than 85% of consumers favor apps over mobile websites. Therefore, converting your website into an app also becomes a great decision from the growth of your brand and business.
There are many ways to build an app like hiring an app agency or freelance developers. However, the easiest and the most frill free way is to build the app for your blog with AppMySite WordPress mobile app builder.
Simply build the app via the AppMySite app builder and download the AppMySite mobile app builder plugin for WordPress websites to connect the blog with the app. AppMySite’s app builder also helps you create an app if you don’t have a website to start with.
Once you’ve built your app and established the connection. You just have to download the app and submit it to the app stores for publication. Your readers will surely love you for this.
Suggested Read: How a mobile app drives readers to your blog
Wrapping it up
To summarize, we saw an end-to-end walk through, from getting a domain and hosting it online to building your blog on WordPress. We then discussed a few ways to make it a successful venture.
To re-emphasize what we stated earlier, there is no quick shortcut to a successful and monetizable blog. But with consistent quality work, your blog will soon shine. For any queries or assistance, feel free to get in touch with us.