AppMySite is best known for enabling WordPress and WooCommerce users to build high-performance native mobile apps.
Native apps are the highest standard of mobile apps you can build. They are the best in terms of performance and load-times when compared to web view apps.
And yet, you might find yourself in a situation where you simply need to convert an existing website into an app. In simple words, you need to build a webview app.
AppMySite also enables you to build a webview app. In essence, you can create a WooCommerce or WordPress app that renders your mobile website in an app.
In this blog
- Step #1: Create an account on AppMySite’s webview app maker
- Step #2: Design your app icon and splash screen
- Step #3: Add your app’s bottom bar and menu
- Step #4: Configure your app’s web views
- Step #5: Add more features to your webview app
- Step #6: Preview your app
- Step #7: Download your app
A step-by-step guide to building a webview app
The following section provides a guide on creating a webview app on AppMySite:
Step #1: Create an account on AppMySite’s webview app maker
The first step is creating an account on AppMySite. You can start for free to explore how the product works.
Once you create an account, you will be prompted to create an app. To build a webview app, you can select the Web to app solution. Here are some highlights of the Web to app product –
- Convert any website to an app
- Compatible with any web technology
- Supports all platforms and frameworks
- Real-time sync between web and app
- Customizable web view interface
- Compliant with app stores
After selecting Web to app as your app type, you can start building your app.
Step #2: Design your app icon and splash screen
During the initial stages, you should design the key elements of your app. These elements include your app icon and splash screen.
- App icon: You can upload your app icon if you already have a design. Alternatively, you can design an app icon with AppMySite’s design creator.
- Launch screen: You can again upload your design, or design a brand new splash screen with the design creator. You can explore existing templates, elements, etc, and create a stunning splash screen.
Once these essentials are complete, you can next add navigation menus to your app.
Step #3: Add your app’s bottom bar and menu
AppMySite enables you to add native app menus to your app – the bottom and side menus. You can fully customize these menus and choose where each menu item leads within the app.
- Bottom bar: With the bottom bar, you can choose a name for all bottom bar items. In addition, you can set a webview URL for where each item should lead. To further customize the menu, you can choose icons for each menu item and design the overall bottom bar as well.
- Side menu: The process of creating the side menu is the same as the bottom bar. One main difference is that you can enable a secondary menu in this case. The secondary menu appears below the primary menu when opened via the hamburger icon in the header.
Both these menus make it easy for your app users to navigate between different screens.
Step #4: Configure your app’s web views
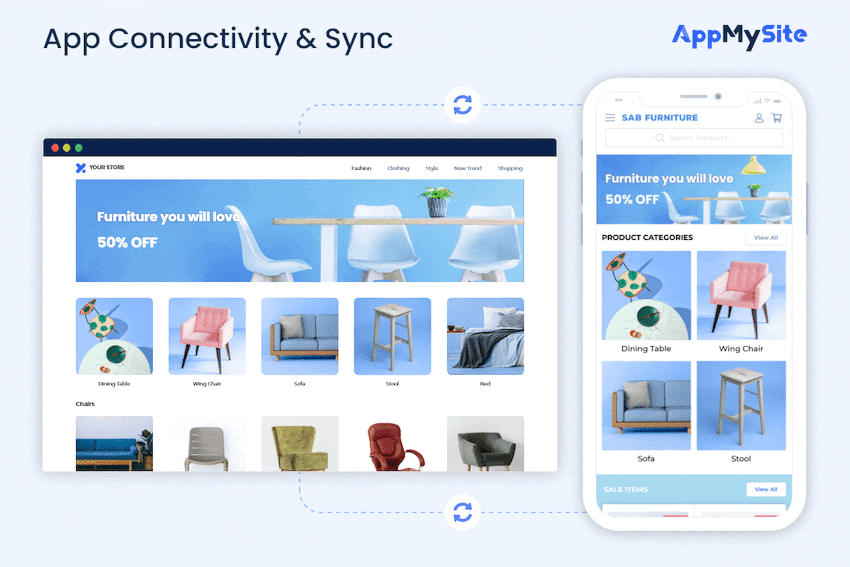
AppMySite allows you to leverage advanced webview features to tailor your app experience.
The first step is customizing your app header. Adding a native header is a good idea to increase the overall nativeness of your app, considering the rest of the screen would render your mobile website. You can customize your app header’s background, text color, etc and set a title for the header.
Alternatively, you can choose to display your mobile website’s header. There are a bunch of other features you can enable such as pull to refresh, pinch to zoom, retain user cookies, etc.
You also have the option to hide certain website elements and sections by providing their class or ID.
Step #5: Add more features to your webview app
AppMySite enables you to add additional features and functionalities to further improve your webview app’s experience. Some of these features have been covered below –
- Notifications: Send notifications to your app users. AppMySite further enables you to send both plain and rich notifications. The notifications module is additionally powered with features to segment app users based on factors like location, user activity, etc.
- Customer chat: You can connect a third-party chat software to your app. This is a great way to communicate directly with your customers.
- Analytics: Enable analytics to see how your app users are interacting with your app. Since you have a webview app, you can also get all your app traffic data on Google Analytics as well.
Once you have all the features you need, preview how the app works. You can also download the APK version of your app to test how it works on a real smartphone device.
Step #6: Preview your app
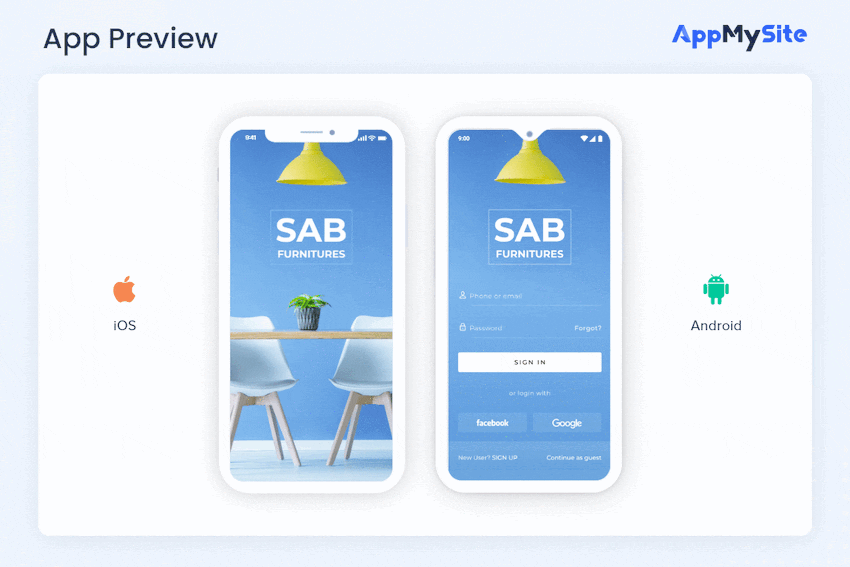
Preview for web view apps is only possible through the AppMySite demo app. The following steps describe the process in detail:
- Download the AppMySite demo app from the Google Play Store.
- Login to your AppMySite account. You will now be able to see all the apps you have created with your account.
- Select the app you wish to preview.
- You will now be able to preview your webview app on a real smartphone device.
Step #7: Download your app
Finally, you can download your Android and iOS app build. Follow the steps below to download your Android and iOS app builds:
- Select Build app under Android. Enter the relevant information in the fields and initiate your build generation.
- You have the option to generate either an APK or AAB build.
- Next, select Build app under iOS. Once you provide your App Store Connect account details, AppMySite will automatically generate all app certificates. You can use these certificates to upload your app to the Apple App Store. AppMySite makes iPhone app development seamless by ensuring you can build & submit your iOS app without a MacBook.
Once you download your app builds, you can proceed with submitting them to Google Play and App Store.
Keep in mind that the apps you create are carefully constructed to get approval from Google Play and App Store. However, if you choose to activate the webview interface, there is a chance your app might get rejected after submission.
Advantages of creating a webview app
Why build a webview app? In an ideal world, you should get a native app built for your business. However, it’s difficult to replicate all your website’s features and scope in a mobile app natively. Furthermore, you need to invest in custom app development to ensure all website features are natively implemented in an app.
Webview apps are thus an ideal alternative. Here are a few reasons you should consider building with a webview app maker –
- Easy development: Webview app builders like AppMySite make it extremely easy to create and launch a webview app. In comparison, native app development can be a little more complicated, especially if you choose to work with app developers.
- Simple management: You don’t need to manage your webview app separately, as whatever changes you make to your website will be rendered automatically in the app.
- Better accessibility: It is easier to find a tool to build a webview app when compared to finding one for a native application. For example, if you have a custom website, it may be impossible to find a DIY tool that converts your website into a native app. However, you can easily find a webview tool to convert your website into an app.
Does this mean you should not pursue native apps at all? While webview apps are convenient, you should choose native apps when they’re viable. For example, AppMySite offers native solutions – WordPress app, WooCommerce app, and Custom app. If these solutions manage to fit your needs, you should consider using them instead of webview apps.
In conclusion
AppMySite’s free app creator enables you to build an app in a matter of minutes. In this article, we learned the process of creating webview apps with your AppMySite account.
There are many reasons you might choose to render your mobile website within the app. You may have a very-well designed website and want to reflect the same aesthetic on your mobile app. The option to enable the webview interface can thus work well in such cases.
Frequently asked questions
Have questions about building a webview app? Here are some commonly asked questions about webview app development.
What is webview development?
Webview development simply refers to creating applications that contain webview interfaces. AppMySite enables you to create webview apps without writing a single line of code. You can choose which screens you’d like to render webviews on. Use simple point and click options to enable webviews for your app and seamlessly render your site’s pages in a native mobile interface.
What is webview used for?
A webview interface is used when you want to display a webpage within your application. Let’s assume you wish to display a webpage within your mobile application. You can add a webview interface to your app and render a webpage in your app.
Does Chrome use webview?
A webview interface is essentially a browser window without the UI bar that appears at the top of the screen. If you remove the UI of a browser, the rendering engine that remains is essentially a webview interface. Chrome technically does not use webveiw as it’s a full-fledged browser with all the essential UI aspects. Webveiws are generally used in mobile applications when it’s necessary to render a mobile webpage.
What is the difference between webview and a browser?
A webview is only a rendering engine. If we strip away the UI section of a browser, the part left is a webview interface. It can be used to render specific webpages in different types of applications.
Do webview apps get rejected on Apple App and Google Play Stores?
App stores may reject your app in case it simply renders your mobile website. We thus recommend you add native elements to your app to make it enhance its nativeness. AppMySite enables you to add native elements like a bottom bar, side menu, settings screen, splash screen, native loader, etc. With these elements, your app is more likely to get approval from the app stores.