Our blogs and resources have always been aimed at making your lives easier and your businesses more efficient and equipped. In our journey of extending the best services and assistance we have achieved many milestones.
While our online mobile app builder equips you to create native Android and iOS apps, our informational updates prepare you for the ever evolving mobile development industry and app market.
Carrying the tradition forward, today we are here to help you with a new thing. Read the blog further and learn how to create an iOS developer account with our detailed step-by-step guide.
Suggested Read: iOS 14 update is here! Know how you can optimize your mobile app strategy for growth
In this blog
- Step 2: Set up two-factor authentication
- Step 3: Join the Apple Developer Program
- Step 4: Enter profile details
- Step 5: Enter contact details
- Step 6: Verify account information
- Step 7: Purchase automatic renewal (optional)
- Step 8: Sign in with Apple Id
- Step 9: Enter billing information and make payment
- Step 10: Proceed to list your fully built app
How to create an Apple Developer Account
An Apple Developer Account enables users to publish and manage iOS apps on the Apple App Store. Creating an Apple Developer Account is actually the process of enrolling in the Apple Developer Program.
It is a must-have tool to configure app services, submit new apps, launch updates, and manage all the apps. Read further and learn how you can enroll for the Apple Developer Program.
Step 1: Create Apple ID
The prerequisite of creating an iOS developer account is to have an Apple ID. If you do not have one already, follow the steps listed below:
- Go to https://developer.apple.com/ and click on Account
- Proceed to Create Apple ID and enter the details
- Enter and save details like: First & Last Name, Country, Birthday, Email ID, Password
- Address the security queries and finish creating your Apple ID
Step 2: Set up two-factor authentication
The next step is to set up two-factor authentication. We recommend using an Apple device to set up the two factor authentication as it becomes simpler.
If you have iPhone or iPad, do the following:
- Go to Settings and click on your Username at the top
- Click on Password and Security
- Tap on Two-Factor Authentication
- Turn it ON
If you are using an Apple Computer, then do the following:
- Open Apple Menu
- Select System Preferences
- Open iCloud
- Open Account Details
- Click on Security
- Tap on Two-Factor Authentication
- Turn it ON
However, if you do not have an Apple device, then you can contact Apple’s support team and seek their assistance to set up two-factor authentication.
Proceed to Sign in to your Account using your Apple ID and password to carry out the rest of the process.
Step 3: Join the Apple Developer Program
Once you are signed in, you will see a display that reads “Join the Apple Developer Program”. Complete the process for the same by following the steps below:
- Click on Join the Apple Developer Program
- Read through the information and Submit
- Pick your Account Type
Based on your entity and business requirements, Apple enables you to choose between the following Account Types:
Type 1: Individual
An individual enrollment enables only a single primary login. The First and Last Name of the individual will be displayed on the App Stores. You can pick this type if you are a sole proprietor or your app can be branded as an individual property.
Suitable for: Individual personalities and celebrities
Type 2: Organization
This is the category recommended for businesses and organizations. You get multiple logins with customized permissions depending upon your security concerns. Besides, it enables the display of the name of the organization on the App Stores which adds a more professional appeal.
Suitable for: Company, Business, Nonprofit Organization, Educational Institution, Government Organization, etc.
Bonus Tip:
In order to enroll as an organization, you will need a D-U-N-S (Dun and Bradstreet) number. It is a unique identification number assigned by Dun and Bradstreet. It defines your organizational identity and legal status as a unique business identifier. Proceed to complete the enrollment process if you already have one. Else, refer this space for more details.
Getting a D-U-N-S number may take some time. Once you have obtained it, you can proceed to enter the information and complete the enrollment process.
Step 4: Enter profile details
Next, you need to enter the basic information about you and your business. This goes as follows:
- Verify your email address
- Enter Name
- Enter Country Location
- Select Account or Entity Type (as described above)
- Click on Start Your Enrollment to finish the process
Note: Treat every step as a professional requirement and enter only authentic and relevant information to avoid any issues in the future.
Step 5: Enter contact details
The next step is to enter contact information and sign up for the agreement. The process is as follows:
- Go to the Your Information page and input information as directed
- Enter Legal Name and Phone Number
- Enter Business Address with Postal Code
- Read through the Apple Developer Program License Agreement
- Check the box and click on Continue
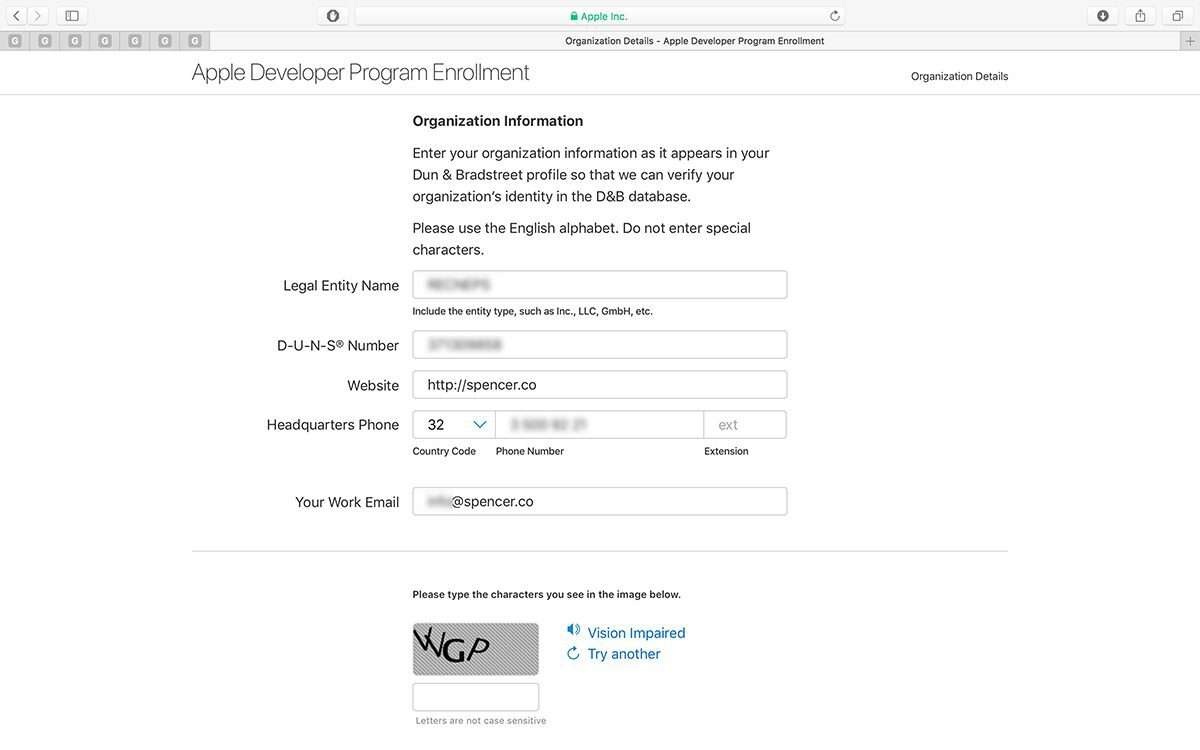
Step 6: Verify account information
Next, you will be redirected to a page where you will have to verify the account information. Click on Continue once you are ready and proceed to the next step.
Step 7: Purchase automatic renewal (optional)
Apple Developer Program is not a one time purchase. To continue your enrollment, you will need to renew your subscription annually.
If you want to opt for an auto renewal you can do it under this section. As you will be redirected to the Automatic Renewal page, you can read the terms of the membership and renewal.
When done reading, you can check the box and click on Continue to finish the process. You can also choose not to activate auto renewal or stop the process anytime by modifying the settings in your Account.
Step 8: Sign in with Apple Id
Once you are done with account verification and renewal process, you will be redirected to the account sign up page.
Sign in to your account with your Apple ID and Password.
Step 9: Enter billing information and make payment
After you have entered the information, you will be redirected to the billing and payment page. Here, you will have to:
- Enter Billing Contact
- Enter Billing Address
- Set up Payment Method (Debit Card, Credit Card or PayPal)
- View the order total and Continue to confirm and make the payment
Enter the required information in the following pages and finish the process of creating the developer account. Wait for a confirmation email from Apple regarding successful account creation (Usually comes within 24 hours).
Step 10: Proceed to list your fully built app
Voila! Your enrollment process is now complete. Proceed to add your fully built app to the App Store using your Developer Account. You can go to your App Store Connect account and file an app store listing under the My Apps section.
Create an app with AppMySite’s iPhone app maker and refer to the guide suggested below to submit your fully built app to the Apple App Store.
Publish your iOS app with AppMySite
With this we have come to the end of our tutorial blog. Hope you have become a pro now and all prepared to manage your own developer account.
Now that you are eligible to publish apps to Apple App Store, it is time you create one and make it available for all iOS users.
Suggested Read: How to create your own app without a single line of code?
Sign up for AppMySite and convert your WordPress website to app without coding. Publish the premium native apps for Android and iOS users and give your competitors a run for their money!
Need a complete guide for creating your iOS developer account? Visit our help center and go through our tutorial to create your Apple Developer account effortlessly.